A free customizable Editable Grid for Dynamics CRM 2015/2016/365/Unified Interface!
UPDATE 01/01/2020: We are still alive and have released a new version! We have updated our solution to work with Dynamics 365 Unified Interface. Please download the solution below for the enhancement.
UPDATE 08/01/2017: We have enhanced our grid again! The latest version includes performance enhancements and exciting new features! We have added the ability to add CUSTOM RIBBON BUTTONS!! Haven’t you missed them since CRM 2011?? Custom ribbon buttons can call custom JavaScript functions to take actions. We have also enhanced our JavaScript extensions by adding in validation events and events for onsave. Please email EditableGrid@Microplanit.com for documentation.
UPDATE 03/15/2017: We have released a new version! The latest version includes performance enhancements and new features! We now allow the grid to be extended by custom JavaScript, Import data to the grid by csv (text, boolean, date, decimal, double, integer, memo, and money FieldTypes), Keep header static on scroll, CASCADE GRID LOOKUPS, Custom FetchXML for lookup filtering, ability to position ribbon buttons, and some minor bug fixes.
UPDATE 06/17/2016: We have enhanced the grid by adding Hierarchical (drill down) grids. This configuration item is available only for our clients that have purchased a license. We have also created the ability to add default values to record columns when new row is created (available in our free version as well).
If you would like to get a copy of the solution, just send us a request at: http://www.microplanit.com/contactus.aspx?p=Free Tools: Editable Grid. You will receive an email with a download link to the Dynamics CRM Editable Grid solution.

UPDATE 02/26/2016: We have dropped support for CRM 2013. If a solution is needed for CRM 2013 please email us at editablegrid@microplanit.com. We have also added additional items such as AUTO SAVE / BULK SAVE, GRID COLUMN SORTING, IN LINE NEW ROW (This will create a new record in CRM from the grid), AND DELETING RECORDS FROM GRID!
How many times have you heard “This grid is great, but I hate double clicking and going into the record to edit it, then going back to my record.” I certainly have heard it many times from many clients. In fact I feel the same way sometimes. It gets really annoying that you have to go into each record and change one attribute. Why can’t MSFT build this into the system? It’s not hard…well maybe it is.
At BusiPlanIT labs, we have done the hard work for you and come up with a solution that leverages JQuery js, JQuery UI js, and SlickGrids js. We have created a full HTML5 solution for you that works in CRM 2013, 2015, 2016, and 365. Oh and let’s not forget the different browsers! It works on Chrome, Internet Explorer, and Firefox.
We are offering one free grid for any use in the CRM. You can place it in anywhere that loads web resources such as a dashboard or on an entity (OOTB or custom) form. The grid can handle showing all records or just related/regarding records. If you are interested in getting more than one grid, contact me, my information is at the bottom of this post.
In our example we will show related contacts to an account record. Although this can be configured for any record, we will show a grid that everyone can relate to.
Below are instructions (with pictures) on how to configure it and use it for related contact on an account form.
Pre configuration step: Install the BusiPlanITEditableGrid solution from the download link at the bottom.
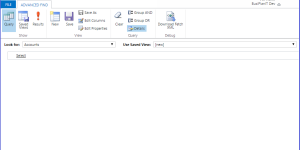
- Since every grid needs a view, we will need to create one. We decided that instead of piggy backing on system and personal views, let’s have users do an advance find view and place the FetchXML into our solution. This allows us to do a little more complex views if needed. Also doesn’t require our users to create specific views that muddy up the entity view drop down list.Go ahead and open Advance find.

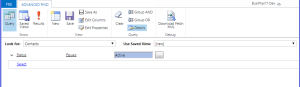
- Select the record types you want to see (contacts) and apply a filter. You can filter as deep as you want. For this example I want to just show active contacts on my account record.

- Pick the columns you want to see in the Grid. There is no column number limit. Do not select the composite fields (Address and FullName) they are not editable in the grid. Status field (status and status reason) will show up on the grid, but are not editable either. Do not worry about the order we will set that later.
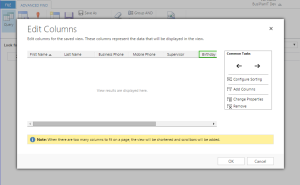

- In order to sort, configure the sorting options. For this grid I want the contacts sorted by First Name.
- Run the advance find query, if it looks okay then you can proceed to the next step. If something needs to change, revisit the previous steps. Remember this query will return all contacts in the system. You do not need to filter the related account, we will do that configuration later. Also, if you want, you can save this advance find view as a personal view, just in case you want to change it later.
- Download the FetchXML and save it.
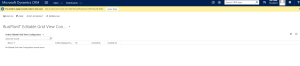
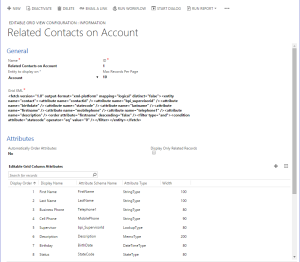
- Now we want to create a new Editable Grid View Configuration record. You can get to this by Dashboards – > BusiPlanIT Editable Grid View Configurations -> + (New) or doing an advance find, querying for Editable Grid view configuration, and clicking create new record. I chose to go to the dashboard since it’s a little faster. We actually created a dashboard in our managed solution for easy access!


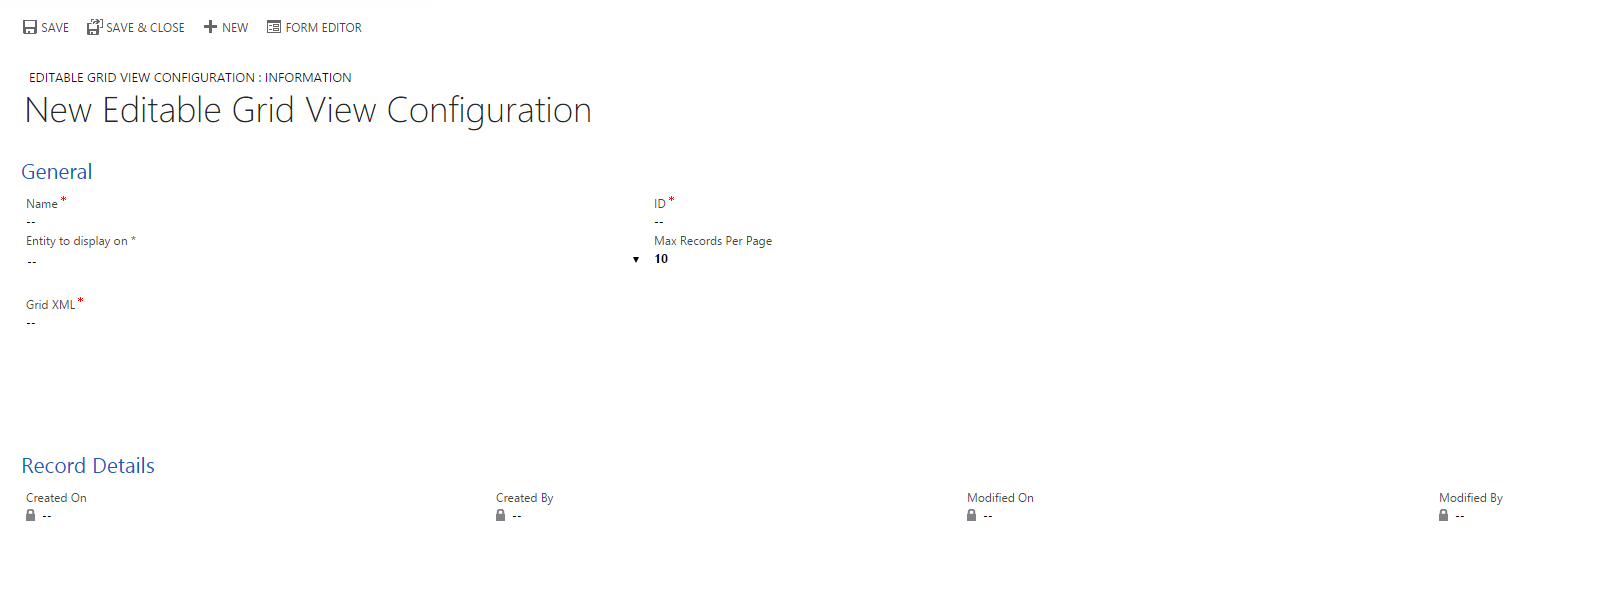
- Fill out the required fields
- Name – Name of the record. This can be anything. For this example I’ll choose “Related Contacts on Accounts”
- Entity to display on – This is the entity you want to display the grid on. For this example we are using Account.
- ID – This is the ID that we will use to determine which grid to display. If you have multiple versions of this grid, IDs will be different for each grid record. Since this is a demo use the number 1.
- Max Record per page – This can be any number from 10 – 300. However for a subgrid on a form I’ve noticed that 10 works best.
- GRID XML – From the advance find downloaded fetchxml, copy the text and place it into this field.
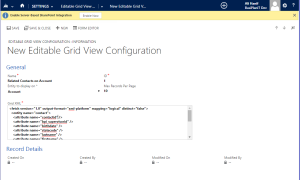
- Click Save and watch the magic happen! Our fancy plugin will parse through the fetchxml and pull out all the attributes that need to be displayed, and also will give you a list of relationship to pick from to show related/regarding records.
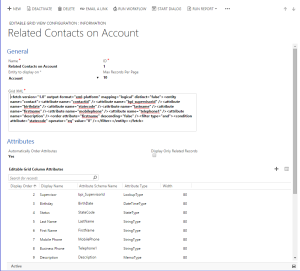


- Do not manually create or delete attribute records, the plugin creates it and keeps it in sync with the fetchxml.
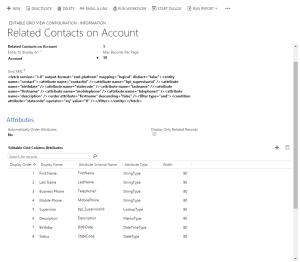
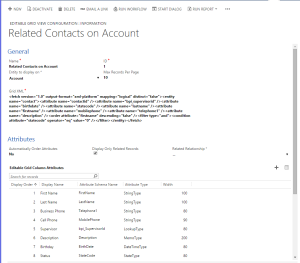
- If the order of the attributes is incorrect (The way it currently display is the left most column is supervisor and the right most column is description), we have a few options:
- Make “Automatically Order Attributes” to yes, and you can adjust the fetchxml, the order will be taken from first attribute name listed in the xml. Save the record after the fetchxml is adjusted, and the order will automatically reorder.
- If you do not want to modify the fetchxml change “Automatically Order Attributes” to No, save the record and change the display order for each attribute record to your liking.In this example I choose to do option “b”.

- Additionally the display name and width can also be adjusted. In my example I wanted to rename Mobile Phone to Cell Phone, it can be done.I went ahead and adjusted the width and names. Just a reminder you can do this anytime, it does not have to be now.

- If we want to only display related records place a check mark under “Display Only Related Records”

- A drop down next to it will appear “Related Relationship” Very similar to how sub grids are in CRM you must pick the relationship you want show in the grid. For this example I want to show all contacts on the account that have the same parentcustomerid (Company Name) as the account record I’m on.
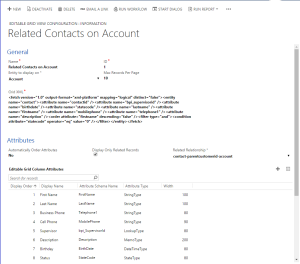

- Save the record and remember the ID number you picked.
- Since I am placing this grid on an account form. I will go over the customizations and edit the account form:
- I went ahead and created a new tab on the form, but really the grid can be placed anywhere you want.
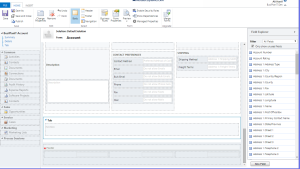
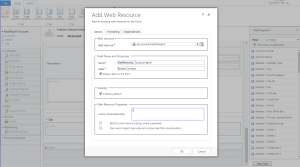
- Inside the tab I will insert a HTML Web Resource
- Web Resource* – type “BusiPlanIT Editable Grid” or “bpi_busiplaniteditablegrid”
- Name – Can be anything I picked busiplanitgrid1
- Label – pick a good identifier for the grid, I picked Related Contacts and checked “Display label on the form”
- In the Web Resource Properties (custom parameter [data]) you must enter the ID of view configuration record we just customized. In my example it was the number 1
- Before you click okay, go to the formatting tab. This will make sure the grid looks good on the form
- Number of rows – what I normally do is add 5 to the “Max records per page” we picked. In my example the Max Records per page was 10. So I put 15
- Scrolling – As necessary
- Display border – I uncheck this so the grid looks like it belongs on the form.
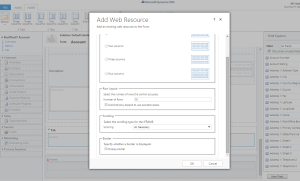


- Click Okay, save and publish the form. You are ready to see the grid in action!
Go to any account and the Grid should be in the location where you placed the web resource

Clicking into (sometimes double click, if you are not focused on the gird) the field opens it up for edit.
Using the Editable Grid:
For users that are not system admins we have created Security roles to append their teams or user record.
Editable Grid User – User role that allows users to only view and user the grid
Editable Grid Customizer – User role that allows a system customizer to customize and modify the grid configuration settings.
Limitations:
- If the fetxchml is complex and you are returning columns from child records, those records will show up in the grid, but will not be editable.
- Deleting a record from the Grid is not possible in this version
- Many to Many related relationship do not show in the related drop down list. But it can still be done by manually modifying the XML. Reach out to me and I will help you. In the future we will add Many to Many relationships to the drop down.
- Status and Status reason cannot be edited in the grid
- If displayed on dashboard, double scroll bars may appear for vertical scrolling (depending on record size and page size).
Text /decimals/money fields – clicking into the field opens an editable text box once you click away from the field, the value will be saved

Look up field types – Clicking into the look up field will bring it into edit mode. You can begin typing and filtered list will show top 50 results from the CRM based on StartsWith.

If you cannot find the correct look up click on “Look Up More Records” will pop open the CRM look up search, where you can select a view or for complex look up types a different entity.

MultiLine text fields – Click into the field will bring up a long text editor. To save changed press the save button.

Date Fields – Date fields are handled the same way a CRM date field is handled. Clicking into the field allows the user to type a date (date must be in format mm/dd/yyyy) or select a calendar to view a date.

OptionSet Fields – work the same way CRM does drop downs.
Opening a record – On the left most column is a check box. Double clicking this will open the record in a new window. You can also right click on the grid and go to open new window as well

Creating a new record – In the top right, above the grid is a plus sign. This plus sign works the same way an OOTB grid does in creating a new record. If you have 2015 SP1 the editable grid view configuration record has a drop down to enable the quick create form. Set that option to yes if desired.

In our latest release we have added the ability to create a NEW ROW and save the row to create a new record
These are the configuration sets that should get you on your way in:
- Auto Save = No (this will give you a save button on the grid to do bulk saves and also enables other features)
- Display Add New Row = Yes (Adds new row button to the grid, were you can add your opportunity products)
- Refresh Grid After Save = Yes

Grid Menu – By right clicking anywhere on the grid, brings up a small menu. From this list you can open a record, email a link for a record, or refresh the grid.

Navigating the grid – By pressing the tab key you can go to the next cell. The arrow keys will also allow you to move from cell to cell.
If you are interested in getting more than one Editable Grid added on to your CRM please contact us at editablegrid@microplanit.com. We are finalizing our licensing model and will get back to you with options. Stay tuned for new enhancement and updates, as we are constantly enhancing our editable grid with new features!
If you have any bugs or issues please email me at editablegrid@microplanit.com.
If you would like to get a copy of the solution, just send us a request at: http://www.microplanit.com/contactus.aspx?p=Free Tools: Editable Grid. You will receive an email with a download link.
DISCLAIMER THIS TOOL IS PROVIDED BY MICROPLANIT LLC. “AS IS” AND ANY EXPRESS OR IMPLIED WARRANTIES, INCLUDING, BUT NOT LIMITED TO, THE IMPLIED WARRANTIES OF MERCHANT ABILITY AND FITNESS FOR A PARTICULAR PURPOSE ARE DISCLAIMED. IN NO EVENT SHALL MICROPLANIT LLC. BE LIABLE FOR ANY DIRECT, INDIRECT, INCIDENTAL, SPECIAL, EXEMPLARY, OR CONSEQUENTIAL DAMAGES (INCLUDING, BUT NOT LIMITED TO, PROCUREMENT OF SUBSTITUTE GOODS OR SERVICES; LOSS OF USE, DATA, OR PROFITS; OR BUSINESS INTERRUPTION) HOWEVER CAUSED AND ON ANY THEORY OF LIABILITY, WHETHER IN CONTRACT, STRICT LIABILITY, OR TORT (INCLUDING NEGLIGENCE OR OTHERWISE) ARISING IN ANY WAY OUT OF THE USE OF THIS SOFTWARE, EVEN IF ADVISED OF THE POSSIBILITY OF SUCH DAMAGE.
28 responses to “A free customizable Editable Grid for Dynamics CRM 2015/2016/365/Unified Interface!”
Trackbacks / Pingbacks
- - August 8, 2015
- - August 19, 2015
- - August 19, 2015
- - August 19, 2015
- - September 1, 2015
- - November 3, 2015
- - April 22, 2016
Leave a comment
Recent Comments
| BusiPlanIT ahanif on A free customizable Editable G… | |
| BusiPlanIT ahanif on A free customizable Editable G… | |
| BusiPlanIT ahanif on A free customizable Editable G… | |
| BusiPlanIT ahanif on A free customizable Editable G… | |
| BusiPlanIT ahanif on Who needs a free customizable… |

That’s a really slick…grid.
really use full stuff. .
Reblogged this on HIMBAP.
Is there any way you can make a particular single field non editable on the editable grid?
Prabhu,
Yes we are releasing an updated version of our grid that will support this. The new version (2.0.2) is coming out next week, but I can send you an early version.
Hello,
can we use the grid editor without related entity? Fo example: we want to use grid editor on open opportunities?
Vit,
Yes you can. You can configure the grid to be shown on a dashboard. Follow the instructions and select Dashboard as entity to be show on.
-Ali
I enjoy what you guys tend to be up too. Such clever
work and reporting! Keep up the terrific works guys I’ve added you
guys to our blogroll.
Hello!
Just wondering if you guys are working on a new release of the editable grid?
I didn’t find any donwload link, where can I download the solution file for trial one Editable Grid?
Is it possible to refresh the grid when an entity is created?
Right click within grid, click refresh.
Michiel, We have also added a configuration that will automatically refresh the grid when a bulk save is done. Please get our latest version
Does this work for quote products? Does the price per unit gets fetched automatically when the user choose existing product ?Does the extended amount got calculated automatically when the quantity change or when the user makes a discount ?
Yes, you can enable the Unit to cascade from product.
Hi, how do I enter time for datetimetype on an editable column?
Many thanks.
Jeff
Jeff,
In our latest release, you click click on the column you want to set as datetime type in the grid configuration and set as datetime type.
Hi,
I am not able to see the button to create a new row within the grid. Is there another release for that or specific CRM version needed?
Aswani,
you need to set AutoSave = No and then you will get an option to display new row in the grid configuration
Hi
is there a way to prevent delete button
Abood, this is an enhancement we are working on